Guide On How To Patina Copper Purple: Easy Steps & Tips
To patina copper purple, you’ll need just a few simple ingredients and a little bit of patience. The process may seem like magic, but it’s a straightforward technique that yields stunning results. By following the steps outlined in this guide, you’ll learn how to transform ordinary copper into a magnificent shade of purple that will amaze and inspire. So, let’s dive right in and uncover the secrets of how to patina copper purple.

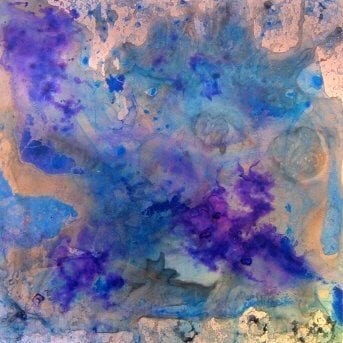
How to Patina Copper Purple: A Step-by-Step Guide
Copper is a versatile and beautiful metal that can be transformed into various colors through the process of patination. One of the most striking patina colors you can achieve on copper is a vibrant purple hue. In this comprehensive guide, we will explore the fascinating world of creating a purple patina on copper and the step-by-step process to achieve stunning results.
The Magic of Copper Patina
Before we dive into the nitty-gritty of patina, let’s understand what patina actually is. Patina is a thin layer that forms on the surface of a metal like copper due to exposure to air, water, and other elements over time. This layer not only protects the metal from corrosion but also adds a unique, aged look that enhances its beauty.
Materials You’ll Need
Before you start the process of patinating copper to achieve a purple hue, make sure you have the following materials:
Materials:
- Copper sheet or object
- Ammonia
- Vinegar
- Salt
- Plastic container
- Paintbrush
- Protective gloves
- Protective eyewear
- Clear lacquer or sealant
Step-by-Step Guide to Patina Copper Purple
Now, let’s get into the exciting part – creating that beautiful purple patina on copper. Follow these steps carefully to achieve the desired results:
Step 1: Prepare the Copper Surface
Start by cleaning the copper sheet or object thoroughly to remove any dirt, grease, or existing patina. Use a mild detergent and water to clean the surface, and then dry it completely with a soft cloth.
Step 2: Create the Patina Solution
Next, prepare the patina solution by mixing equal parts of ammonia and vinegar in a plastic container. Add a pinch of salt to the mixture and stir well until the salt is dissolved.
Step 3: Apply the Patina Solution
Put on your protective gloves and eyewear before handling the patina solution. Using a paintbrush, apply the solution evenly onto the clean copper surface. Make sure to cover the entire surface with the solution for an even patina.
Step 4: Let the Patina Develop
After applying the patina solution, let the copper sit undisturbed in a well-ventilated area for several hours to allow the patina to develop. You can check the progress periodically to see the color change and adjust the timing based on your desired shade of purple.
Step 5: Seal the Patina
Once you have achieved the desired purple patina on the copper, it’s time to seal the patina to protect it from further oxidation. Apply a clear lacquer or sealant over the patina and let it dry according to the manufacturer’s instructions.
Tips and Tricks for Perfecting Your Purple Patina
Here are some additional tips to help you achieve a flawless purple patina on your copper:
Tip 1: Experiment with Different Ratios
Don’t be afraid to experiment with different ratios of ammonia, vinegar, and salt to achieve varying shades of purple. The more you play around with the solution, the better you’ll understand how it affects the patina color.
Tip 2: Control the Patina Development
If you want a lighter purple hue, reduce the time the copper spends in contact with the patina solution. For a deeper purple color, let the patina develop for a longer period. Keep an eye on the process to achieve the perfect shade.
Tip 3: Enhance the Patina with Heat
If you’re looking to intensify the purple patina, you can gently heat the copper surface after applying the patina solution. Use a heat gun or a torch to warm the surface evenly, which can deepen the color and create interesting patterns.
Creating a purple patina on copper is a rewarding and creative process that allows you to experiment with colors and textures. By following this step-by-step guide and incorporating the tips and tricks provided, you can achieve a stunning purple patina on your copper projects. Embrace the art of patination and watch as your copper transforms into a unique and captivating masterpiece!
Remember, practice makes perfect, so don’t be discouraged if your first attempt doesn’t turn out exactly as planned. Enjoy the journey of discovering the beauty and versatility of copper patina, and let your creativity shine!
Learn how to add patina to copper on Make It Artsy with Mary Hettmansperger (105-2)
Frequently Asked Questions
How can I create a purple patina on copper?
To achieve a purple patina on copper, you can use a combination of ammonia fumes and salt to encourage the oxidation process. First, clean the copper surface thoroughly. Next, place the copper item in a sealed container with a small dish of ammonia and some salt. Allow the fumes to interact with the copper over several hours to develop a purple patina.
What are some natural ways to patina copper purple?
If you prefer more natural methods, you can use a mixture of vinegar and salt to patina copper into a purple hue. Simply create a solution of equal parts vinegar and salt, then apply it to the copper surface. Allow the mixture to sit on the copper, periodically checking until the desired purple patina develops.
Can I use household items to patina copper purple?
Absolutely! Household items like ammonia, vinegar, and salt can be effectively used to create a purple patina on copper. By utilizing these readily available items, you can achieve a unique and vibrant purple oxidation on your copper items without the need for specialized chemicals.
Final Thoughts
To patina copper purple, start by cleaning the copper surface thoroughly. Next, apply a patina solution with a sprayer or brush and allow it to dry. Repeat the process until the desired purple hue is achieved. Remember to seal the patina to protect the finish. Patina copper purple by following these steps for a stunning, unique look.